Showing posts with label Cross Stitch. Show all posts

Wednesday, March 03, 2021

Long Time, No See

 Ever since reading about mini black holes that appear all around us, I've been convinced that I'm sensitive to them and that is why I have such a poor sense of time. Although writing it down like this does make it seem rather silly. Anyway, whatever the reason, I had no idea how long it has been since I posted about my embroidery - 7 years! It's not that I'm not doing anything, in fact, I've done quite a bit. It's just that once I was back at full-time work, I just didn't have the time for long blog posts. And I've found Instagram to be a great place to share things. But now, as I'm getting back to working on my own designs, and moving towards finally working on my casket, I find I need a longer form to write about my stitching.

So to start with, some eye candy to show I've been busy, and then on the weekend, a post about a Monet inspired piece I started in 2016 and I'm finally finishing.

I started this Jane Nicholas piece at EGA National Seminar in Alexandria, VA in 2016. Finally finished in 2020.


This was a Relics in Situ course piece. Lots of fun. On silk!


These next two are Owl Forest Embroidery - Hedgehogs and Hummingbirds. I love both.


Becky Hogg goldwork fritillaria and kingfisher - and I have her fox on my shelf!


And these are RSN online courses. The Goldwork is by Becky Hogg, and since I took the online course first, I was really comfortable working with the kits.

The RSN silk shading was taught by Kate Barlow was great, and my shading for the Jane Nicholas piece above improved after taking this course.

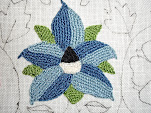
This RSN course Introduction to Jacobean Crewelwork, was taught by Deborah Wilding. I loved it and have since done more!


Friday, June 27, 2008

Finishing and starting

I'm trying very hard not to take on too many things over the summer. Since I stopped working full-time nine and half years ago, I've had this awful habit of thinking that I'll have lots of time in the summer since the kids are out of school and I stop leaving the house for my part-time job (i.e. I still work on the computer from home, but I don't go to the library every day). Somehow the time never materializes and I'm frustrated. So this year I've set very modest goals - work on the Stitchin Fingers Hand Embroidery Group Stitch Along, do some stumpwork, and do some weaving.

But first I thought I'd get a few things out of my done but not finished pile - you know the stuff that has the embroidery done but needs sewing up or framing. I started with the little topiary piece by Catherine Jordan that she taught at my EGA chapter. Catherine's kits included cute little metal finishing forms, which I found quite easy to use. The project was originally finished as a pin keep, but I have a large pair of scissors I'm using in my weaving kit so I made a scissor fob - it would be too big and heavy for embroidery scissors.

These photos are before framing, but I did frame these two pieces from Colonial Williamsburg that I stitched up for my SIL. Quick and easy, which was good for evenings watching mysteries on TV. I've discovered you can't do extensive counting while watching a good mystery - maybe while watching a bad one, I haven't tried that.

This project is from way back in September 2007. I decorated the flap of a neat, fold up embroidery blanket. You put it on your lap or table to provide a clean working surface and it is white or dark (green in my case) depending on what sort of background you need to work on. I've had the stitching done since last year and finally stitched it up on Saturday. You can see the fancy topstitching I did with the machine - I haven't used it much so the fancy stitching is still fun. It folds up into a neat little packet that easily fits in an embroidery bag.

My starts are weaving projects - although I will be starting some embroidery soon as well. I was able to get to the weaving studio this week and got a good start on the baby blanket I'm making.
Of course it didn't turn out quite as I expected - I thought the coloured weft crossing the white warp would be lighter, more like the white weft crossing the coloured warp. But I am happy with the result and it will be a soft, washable blanket in the end. I am doing double weave so there are two layers, one side open, so when I'm done it will open up to a 48 inch wide blanket. Because I am just doing plainweave, I have a chance to concentrate on my edges this time and work on tension. In retrospect, I should have done some practice weaving to get comfortable with the tension of this particular yarn, but after over a foot of weaving, I'm not starting again.

I also found a small wood frame loom that belongs/belonged to DD the younger. I've taken it over and I'm working through techniques in a tapestry book I have out of the library (sorry I'm too lazy to walk to the other room to get it right now, I'll tell you the title later). Eventually I want to do real tapestry weaving, but I'm learning from my TAST experience and making a sampler to practice things first. The pale blue is the header so it isn't part of the piece - although I have been know to make some poor colour choices. Not much yet, but I'm learning, which is the main thing.

Wednesday, June 11, 2008

Value of backstitch and a finished horse

I have a few memories of embroidering as a child, but I really don't remember much of what I did until I started doing reproduction samplers about 25 years ago. When you stitch samplers, back stitch is usually for letters but usually there isn't much. Occasionally I'd do some cross-stitch pictures as gifts and there the value of back-stitch really shows. I've been working on a couple of baby-bibs and as you can see from this photo, a blob of brown is transformed into a bear with some back-stitch.


I've finally finished the horse for the center of a CQ pillow that needs to be done next Tuesday night for my EGA meeting where we need to present our president's challenge CQ items. The front half of this horse seemed to take forever. I never felt like I was getting anywhere. All the gray, gray and more gray! But then suddenly, it was done. I'm quite pleased with the result as is DD the older who did the initial drawing, and DD the younger who asked that the horse look like her favourite from the barn - she will be getting the pillow. I have a CQ landscape sort of idea and I will be painting the fabric around the horse - hopefully without staining the horse! But you never know with me and paint. Maybe I'll stick with the watercolour pencils?
Here are the two newest members of our family, Chocolate and Dude. You can't really see it in this photo, but Dude has a forehead cowlick which gives him this funny little bit of hair sticking forward. They can both climb out of the pen they get to play in, so they must be watched constantly
The girls did the photo session and had trouble keeping the boys in line. I find this photo very funny.

Tuesday, August 14, 2007

Small fun stuff

As I've been contemplating other bigger projects and deciding where to start, I've been working on smaller things. I finished these two this week. Technically, the St. Paul's on the bottom isn't finished because I need to make it into an ornament, but the cross stitching is done. The top is the commemorative needlebook kit we received at Plimoth Plantation last week (see previous post). Isn't Wendy White's design lovely? And I really enjoyed working with the perforated paper card. I have an extra special bit on my needlebook. I saved the ends of the gold wrapped silk I was using on the jacket and made the top pink flower on each side with it.

Carol Ann had a question about the piece I was working on for the jacket project. I don't get to finish the underarm piece. All the pieces stay at Plimoth Plantation and get worked on there. Some in my group were there for a second go round. But others like me were there for the first time. There will be sessions every month until next year but I don't think I'll be able to go back so I won't be able to do more on the jacket. But it is nice knowing I've been a part of such an amazing project. Tricia Wilson Nguyen is working on a series of kits that will be available based on this piece though, for those who are interested - keep a look out.

Monday, May 28, 2007

Stitching kit done

Despite having a few other things to do, I managed to finish the stitching kit I'm giving to the art club teacher who supported my VA tapestry idea. The last meeting is today after school and I'll post the finished tapestry tomorrow. For the top of the tin I decided on a real sampler of stitches so she would have a small reference library in hand. Being a part of TAST made this an easy project, although choosing what to do was a bit hard. The top row is cross stitch, the next a blackwork lozenge motif, both done with cotton floss, then Queen stitch, which is done with flower thread. The initials are cross stitch again, but this time in Vicki Clayton silk. The chevron stitch is done in linen thread (you may recognize this from my TAST work). Next Algerian eye done with Gumnuts Poppies wool/silk thread (really fun to work with). The up and down buttonhole variation is in floss again (this was from Elizabeth at Quieter Moments) and finally a row of flowers with herringbone leaves done in flower thread (remember TAST week 1) and French knot flowers in floss. The border is the crossed buttonhole from TAST last week.
Here is a side view show the ribbon I used to cover the tin. The lid has had dyed silk ribbon wrapped around 3 times. The bottom is some new Martha Stewart ribbon from Michael's. It is self adhesive and fit perfectly around the bottom of the tin. I used the same ribbon and a couple of the others in the pack to cover the bottom as well.
Inside is the biscornu and scissor fob, on a new pair of scissors. I put a magnetic bottom in the box, and included some gold plated needles and a needle threader. Below is the finished scissor fob since it wasn't completed in the last post.
I really had a great time doing this. I always wondered about people who specialized in 'smalls' but now I can really see the appeal. It was just so much fun deciding what to include and stitching up these things, and the change from stitching to finishing keeps the interest going. Mind you, I think I need to read up on how to finish tin tops. I sort of fudged it with some double-sided fusible interfacing and double-sided tape and I'm sure there must be a better way.

Saturday, May 26, 2007

TAST 21 Crossed Buttonhole Stitch

As mentioned in my last post, I decided to devote my stitching time to making a small sewing set for the art club teacher who didn't think I was crazy when I suggested the VA tapestry project to her. So while I don't have a neat little picture or interesting set of variations, I do have this week's TAST as a nice border on a biscornu and scissor fob. This is the finished biscornu (can't begin to list all the sites I have seen this at, as well as seeing a couple done by an EGA chapter member at a meeting, just Google the word and you'll get instructions).


This is the top of the scissor fob. Both of these will fit in an Altoid's tin, so I'm also going to stitch something for the lid. I'm not sure what yet, but it will have the same blue crossed buttonhole border.

I'm using 28 count Monaco cloth for this project and it is the first time I have used this type of cloth. It is quite nice for the over one work I am doing on these pieces. One of the members of my EGA chapter did some hardanger work with it and she thought it worked quite well for that. Having recently done a pilot class for a pulled work project I think it wouldn't be very good for that, a bit too stiff.

Saturday, May 05, 2007

TAST 18 Woven or Whipped Wheel and finished knot garden cross stitch

For this week's TAST I combined weaving and whipping to make a knot garden - literally since I added a knot when I went around threads. I first did the black for paths, going under all the light brown base threads and knotting on the vertical and horizontal threads. Then I started with the green, making knots in a square for the boxwood edging in each quarter and weaving in between to give the idea of leaves for the roses. Then I went around with each pink making knots for the flowers. I am happy with this one except for my choice of path colour - I should have made it a dark brown. The green and pinks are DMC linen thread which I just purchased Thursday and had to try out. As you can see, I've gotten over the idea of saving threads for some important project! I really love the texture of the linen. I used 4 stands of the green and six of the pinks.

I was inspired first by the radially symmetrical pattern of the wheel, and I thought there was potential for multiple rows creating an interesting pattern. Then, as I finished off the knot garden from the Museum of Garden History below I thought a knot garden would be perfect. I did make an attempt at a more complex design but it was not to be, so I stuck with an easier plan.

Monday, April 16, 2007

Trip to England

Just came back from a wonderful 8 days in London, England. Sunny every day and in the 70s, so it was great for all the walking we did. I was able to tour through two gardens. The knot garden at the Museum of Garden History - which I was able to get as a kit for cross stitch and of course I started it on the plane - see above. I also toured the gardens at Kew, which didn't involve any embroidery but I love the gardens.
The other embroidery stop was the Victoria & Albert Museum. The textile area was closed on the day we went, but I found lots of textiles in other parts of the museum to drool over, including the Martha Edlin casket and some stumpwork mirror frames.
Of course we saw all sorts of castles and houses and museums and the Globe Theater and even went to a classical choral concert at St. Martin's in the Fields church. All in all an excellent trip.

Friday, April 06, 2007

Hoppy Spring


My EGA chapter did mailable stitched envelopes for this year's president's challenge. The envelope had to be designed for a special day. I sent off a spring flowers envelope for the first day of spring. This week I received a bunny decorated envelope for Easter. Merry Susan stitched these and then tucked a really nice scissor fob chart into the envelope. I love it!
Saturday, February 17, 2007

TAST 7 Feather Stitch

I had one of those weeks where I lost track of the days, but that doesn't mean I didn't stitch. For this weeks sample, I tried stitching on a piece of black linen I received in a sample pack. I have always liked to look of black backgrounds, but I've never tried one so I thought this would be a good chance. I was surprised to see that the silver blending filament I used on the third row of double feather and closed feather stitching did not show up that well - even worse on the photo. On the other hand, all the floss colours I tried look quite nice. I especially like the feathered chain stitch - fourth row down in green. Because I am doing a stitch book, I've been trying to only use the one stitch in my sample, but I really like the use of feather with other stitches like the seems Ati has done. Since I mainly do embroidery, especially flowers and gardens, the packed feathered chain in white and purple at the bottom of my sample interest me because I can see doing long arching rows in green to make trees.

Below are a couple of my other projects of the week (I have also been working on a band RR and I had to wait until today to get muslin for more 3-D flowers). The top is purchased bookmark material with horses from a pet cross stitch book. I did the horses in the colours my younger daughter wanted. The left is the Appaloosa pony she shows, the middle is a bay, and the right is a fantasy horse with a silver tail - note that the silver seems to show up better here than on the black.
This bookmark is from a kit we purchased in England two years ago. My older daughter wanted to make it. She decided after starting the border that she didn't like cross stitch so it has been sitting since then. We are now planning another trip to England and I had the urge to stitch something British, so I confiscated the kit and made it up for her, which she was happy with.

I also practiced my lute a bit. I am working on two pieces that have a know tune since that makes it easier to tell if I'm actually playing it correctly. It is sounding a bit better. I received peg dope and some better quality strings for Valentines day (who needs chocolate) so I'm hoping to work with those tomorrow to see if the sound quality improves a bit. I'm hoping the peg dope will make it easier to tune the 13 strings and the better strings should reduce the buzzing on the lower notes. I'll keep you posted.