Tuesday, July 31, 2007

TAST 31 Cast On Stitch

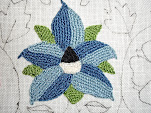
This was so much fun! I started thinking I'd do a pink flower but the first petal reminded me of a worm so I went with it. In keeping with my personal challenge, the dirt, beak and bird feathers are also cast on stitch. The eye is a French knot.
I did notice with this stitch that I had to be careful of twists. If I cast on lots of stitches it was hard to keep things straight - although sometimes I let it twist, like the worm. I regularly let my thread hang to keep the twist out.

Monday, July 30, 2007

TAST 30 Buttonhole wheel

I did another sort of experimental (at least for me) sampler this time on a piece of felt I made recently. It was very interesting to see the way the different colours worked on the different backgrounds. This piece has the highest form of compliment - my daughters like it! And I had fun which is even better.

TAST 29 Arrowhead stitch and finished Dragon CQ pillow

I've had stitching time but not blogging time the last couple of weeks, but I finally have a chance to sit and write. I'm very excited because this morning I sent off an article and some photos on the VA tapestry project I did this year with my daughter's art club. It will be in the December issue of the EGA magazine, NeedleArts. That has been one of the things keeping me busy.

On the TAST front, I was so taken with some of the multiple arrowhead rows in Sharon's samples, I decided to use that stitch on my last Dragon CQ pillow seam. First, since I've learned how important testing is, I tried some arrowheads on a counted thread doodlecloth to get a feeling for even arrowheads. I decided I liked the triple blue one best, with all the arrowheads in the row starting from the same seam. By the way, the green mess represents Sting singing a John Dowland song on the album Songs from the Labyrinth. It is a contrapuntal sort of round and it was going through my head. I don't think I'm ready to illustrate Fantasia style yet.


So, after the practice I came up with this seam. This was the third try at the bugle bead row. The first time, I didn't have enough to do the whole row so I took it out and tried using some coloured half bugles I had lying around for every other arrowhead. It looked horrible so I took it out again and waited until I could get out and buy a new tube of beads. I'm very glad I did because I'm happy with this seam.

And here is the final pillow. My first CQ project is done! As well as having help from Sharon's TAST challenges, I had help and encouragement from ktj in pa who sent me patterns and encouraged me to try crazy quilting.

Tuesday, July 17, 2007

Learning to ride at 45

My daughters have been riding horses for just over 4 years now and for the last two they have been particularly active helping get younger riders get ready for lessons, helping around the barn, and most recently, we have been feeding all the horses two evenings a week. Of course they are too young to get there alone or be at the barn alone, so I agreed to stay with them. At first I just sat and read, but it took them a long time and they argued about who was doing what. So I stepped in to delegate and took over the job of putting the grain in the buckets; the girls move horses in and out, and give water and hay. It has been a wonderful experience for all three of us and I have come to enjoy the horses very much. They all have such wonderful personalities, all very different. Well, I finally decided that it was time I learned as well. At first I didn't say anything and kept putting it off, but then I actually mentioned it, so I had to follow through. Today I had my third lesson (the photos below are from my first lesson a couple of weeks ago). I have discovered that getting off is much harder than getting on. Steering isn't too bad, but it is counter intuitive that the opposite leg from your turn is the one you need to squeeze with. And, I must admit that it is much, much harder than it looks. You have to think about body posture, and legs and heels and toes and hands and reins and then on top of it all you have to look where you are going! And when you trot, you have to bounce at the right time! But I have a fantastic instructor who is very patient with children and adults and I'm having a blast. And there are only a couple of muscles that are complaining at the end of the day.


I don't know how long or how far I'll go with this, but I'm pleased that I pushed myself to get out and do something active, it has been good to know I can do it, and I'm very happy I found the time. I highly recommend trying something new to everyone!

Monday, July 16, 2007

TAST 28 Sheaf stitch and Dragon CQ progress

I had limited stitching time last week because of work, so I did a very small sheaf stitch practice before using it on my CQ block. I was glad I did because I tested different spacing, both of the uprights in the single stitch, and the spaces between stitches. When I tested the beads with the stitch, I realized that I had to give extra space between stitches to make sure the beads had space. Once again, I've learned the value of testing on a doodle cloth before stitching on the actual piece. You'd think after all these years I'd have learned that but I've always had the mistaken belief it would waste time, when really the time waster is pulling out stitches that don't work because they haven't been practiced.

So here are the rest of the seams I've done. This is the feather chain and wheatear intersection. I added beads since the last time I posted this block, and purchased more of the pearl coloured Krenick to finish the wheatear seam.

I added blue beads to the gold Basque stitch and charms to the Chevron.

I'm still not sure about the light blue ribbon seam. I've added gold spacers in two different sizes but it still isn't right. I'm thinking of weaving some silver filament thread through the ribbon. We'll see.

I think this will end up being my favourite seam. It is the bullion braid I worked on during TAST 27 with different colours. I'm not quite done yet, but it looks good so far.
Here is the whole block as of last night. I'm not sure if you can tell, but I've padded the dragon to make it stand out. I'm thinking of the best way to ground him, since right now he is just floating there. We looked at crystals for him to have his front paw on, but there was some disagreement about the size yesterday, so next time we are at the craft store I'll take the block so we are sure of the size. The last seam is in the bottom left and so far no inspiration. Any suggestions are welcome!

Thursday, July 12, 2007

Inspiration from science

I was surfing some science sites at work and came across the Nikon Small World contest site. Have a look at this page of images taken by microscopes and see what you think. Sort of reminds me of the piece at Fiber Art Chic or the aerial view of Death Valley by FreeFlyingLady (although obviously Death Valley is not microscopic, but take a look and see what I mean.)

Saturday, July 07, 2007

TAST 27 Bullion and a CQ block

As I thought about the bullion stitch, I wondered if you could use it to make something that looked like cording, so I used some gold to try and get the look. I started without enough of an angle, but I think the top bar of gold comes close. Then I played around with flower forms, then I wondered if I could make upright loops. The blue loops have over 20 turns of thread around them. I had to try fuzzy white crewel wool in raised loops to make a sheep, and I thought smaller loops, some raised, would make a nice grass or moss look. My final trial was a braid, which was fun, and I really like it so I'll use if for one of the seams on the dragon CQ block below, although in different colours.


I used my TAST stitch book to decide on seam treatments - I think it will be a great resource and with 27 stitches in it now, quite full. As I look at this block, I realize it needs more so I'm going to add beads or sequins to the seams. I'm also thinking the dragon's front feet need some sort of crystal to rest on, and I think I've seen just what I need in the beading and jewellery aisle at Michael's. I'll wait for the next coupon though.

Thursday, July 05, 2007

Beading WIP done

This has been a quiet week so I've had time to finish my small beaded turtle pond picture. Luckily I decided to check how the frame edges fit before I was done and discovered that I had somehow misjudged the width, so I had to take out a couple of cattails and some tiny gold beads. At least I knew how far to go with the blue beads in the water.

This has been a great learning experience for me. I won't offer to make a picture with beads chosen by somebody else; I found it impossible to use all the beads and sizes my SIL had picked out in the same picture.

I've also learned that I need to have a better work area to do beads. I sit in a very comfortable chair under a light and I would rest the bead container on the arm as I worked. Of course I knocked it over more than once and had to dig beads out of the chair - and I'm sure some are still there.

I really enjoyed doing the completely beaded lily pad and the water around the lily pads. I like that densely beaded look. But at the same time, I like the purple pickerel week flowers and the beaded cattail. Just a few beaded highlights are nice as well.

I think I'll eventually try another beaded picture but I will have to gradually enhance my stash before doing so - this took lots more beads than I realized for such a small piece - and I'll plan very carefully.

I've included this photo of the picture framed along with the unframed piece as well. I always find it interesting how much of a difference the frame makes. The frame colour is greener in real life so it does go with the picture.

Monday, July 02, 2007

Next Challenge - some more beading


Between making beaded stitch counters as favours for my EGA chapter's June meeting and my daughter becoming very interested in beaded jewellery making, it seems inevitable that I wanted to try using more beads in my embroidery. How can you walk down the aisles of beads and not want to try some! My SIL had a collection of beads that she wanted something made from so I offered to make a picture for her so I could try my hand at this. The main bead is a tiny turtle (not yet in the pond) and in a sense this is a memorial picture for her long lived turtle that is now gone.

Anyway, it is much harder to get things looking good than I expected. Not that I expected it to be easy, because I can see how much work goes into the pieces on people's blogs. But I just don't seem to be able to get the beads I have to fit in with the design I've started. Maybe I just need a different selection of bead colours and sizes than I have right now, at least for this type of piece.

I embroidered the background plants last night and added the brown beads for cattails and the tiny purple and gold beads on the other plants. So far so good I thought, but then I tried to sort of fill in with various beads and discovered they all just looked to big and bulky for this picture. I had rock like beads for the pond's edge and again, too bulky. The small flower shaped beads seem fine, and I do like the glass butterflies, but most of the other beads don't work. So I think for the pond I'll stick to some small bead highlights so I don't detract from the turtle.

This piece is only 4x6 because I found this neat picture frame that actually has 1/2" depth built in which would allow for the beads. I'm thinking I'll get another in a different colour and try a modern design in beads, maybe working in a different style will allow me to develop the bead dense look I would like to try. Or maybe, after I finish a piece I have due at the end of the summer, I'll look into taking Sharon B's sumptuous surfaces course - her beaded shell design is just the sort of thing I'd like to work on. There is no way I can manage it for the July 11 course, but I think it is in my future.

Wednesday, June 27, 2007

Something new and TAST 26 Half Chevron

Well, I finally did it, I tried making felt. We had some roving from a needlefelting kit, and since the kids just wanted to make dogs, I decided to use the other colours to make felt. The photo above is the front (or at least the side I decided to use) and the photo below the back, which is also quite nice. It was a fun experience and my younger daughter also tried her hand at is and enjoyed it as well. Of course our pieces are only about 4" x 5" so they are only useful for so much. And they aren't thick or strong. We'll continue working but in the meantime, I had a new medium for my TAST practice.
Here is what I have done with the half chevron, including two beaded curves, also something new for me. I'm very pleased with this since this type of embroidery is such a new thing to me. It was very nice working with the cotton floss on wool felt, and the beads weren't as tedious as I expected. I just sort of followed the shapes in the felt and tried not to make the colours clash. All in all, a very fun experience.


Friday, June 22, 2007

TAST 25 Long and Short Stitch

In my stumpwork projects I often use long and short, or at least a reasonable approximation, for shading and filling petals and leaves and such. So I thought I'd try doing counted long and short to get a real feel for the stitch. I also wanted to experiment with colours and shading so I made a rainbow band of sorts. I had a harder time than I expected getting four shades of the same sort of colour, I guess that means I need to add to my stash:-) But it was very interesting to see how the shades worked together or in some cases didn't - although I guess it would depend on the look you were going for. The small red sample is done with 2 strands of overdyed silk. I love this colour and I love the way the shading works. It would be quite different with satin stitch covering the same area so I can see the use for this stitch with overdyed threads as well.

Below is a stumpwork version of the watercolour 'portrait' of Jane Austen done by her sister Cassandra. which I have stitched using long and short.

Monday, June 18, 2007

Stumpwork project done!

Back at TAST22 Satin Stitch I showed a leaf and some petals that I was working on for a new stumpwork project. It all started out with my trying to figure out what I could do with Altoid tins, other than a tiny sewing kit, since I've become very fond of the chocolate coated Altoids and have a few tins lying around. I came up with the idea of making a book, sort of. The outside shown above is supposed to look a bit like a book, complete with gilt page edges. Instead of pages inside, I have put a stumpwork Virginia rose.


In my new spirit of creating for art's sake, this piece has no purpose and will not be a gift. I am just going to enjoy it.

I would love to hear from others who have done stitched things with Altoid tins (since I have more). I did do an online search and found all sorts of things, but most weren't stitched and I really don't want an Altoid tin mouse for my computer or an Altoid tin wallet! I am also interested in how you stick things to the tin. I have used double sided tape and some Heat n' Bond for my projects so far because I hate liquid glue.

Sunday, June 17, 2007

TAST 24 French Knots

Even though Sharon gave us leave to mix French knots with other TAST stitches, my personal challenge is to try and use only the stitch of the week with maybe a bit of another stitch. I've used French knots in many things, especially since they are quite useful when doing flowers. This week I decided to try French knots with as many types of yarn as I could find, and with different numbers of strands. I've used tapestry wool, DMC cotton floss, DMC linen floss, rayon floss, silk, silk ribbon, and Krenick braid and blending filament. I learned alot. Using blending filament (4 strands) to make a French knot is like trying to herd cats. Silk ribbon doesn't make a French knot different enough to make it necessary to use ribbon. Rayon is almost as bad a blending filament. And as always, I love silk!!!
For those who are wondering, I was thinking of the parterre garden at Hampton Court Palace when I drew this design. As usual, it ended up lopsided, although the initial drawing didn't look quite so skewed. I must work on symmetry!

Thursday, June 14, 2007

A Book Review of Austenland

Last week I learned about a new book, 'Austenland' by Shannon Hale, when a short description was posted on the Janeites list.

Yes, I'm a fan of Jane Austen. I'm not obsessive, and I'm certainly not a scholar, but I do enjoy reading all of her work and some of the biographies, comments and critiques. I also enjoy reading sequels and other related books, although I don't necessarily like them all and I rely on my local public library for many of them for that reason. But I won't be reading the new book that suggests that Mr. Bennet had autism!

Anyway, Austenland seemed like nice, fun reading. Here is the blurb I saw.
"Diane Hayes seems to be a normal young New Yorker, but her secret obsession with Mr. Darcy, as played by Colin Firth in "Pride and Prejudice," is ruining her love life: no real man can compare. On a trip to an English resort catering to Austen-crazed women, Jane' s fantasies of meeting the perfect gentleman suddenly become more real than she imagined. Shannon Hale's bestselling young adult novels (Goose Girl, Princess Academy)portend great fun for readers - Austen fans or not - of her first novel for grown-ups."

At first I was thinking I would rush out and buy it, but a quick look at the Amazon reviews made me think library instead, and sure enough it was in processing and I put it on hold and had it in my hand within 4 days.

To start with, if I had bought it, I wouldn't have been upset. It was a fun read thatI was able to finish in one day (with the usual family interruptions). It was quite funny to read the lines the actors at the resort were given to create the Regency feeling for the visiting women. The author was obviously familiar with Austen's work because many of the characters, scenes and plot stories were based on things from the novels. It was a fun challenge to be able to pick out the Austen novel or character that was the inspiration.

While there were many enjoyable and silly parts to the story, it was also interesting to follow the main character, Diane, as she wrestled with what was real and what was fantasy. As Diane comes to grips with what it might be like to live at the time of Jane Austen and what she wants from her real life, you get the sense of personal growth that Austen's characters actually go through in the novels (Even Fanny Price grows a bit, thought many critics don't agree).

All in all, I would recommend this book if you enjoy Austen sequels or Regency romances. If you don't like the Kiera Knightly P&P, you probably won't like this book.

Friday, June 08, 2007

TAST 23 Wheatear and Plimoth Jacket sample

I'm afraid after my excitement over the Plimoth Jacket project sample that I wanted to mail off as soon as possible, I had little energy left for wheatear samples, but I did manage a nice row of strawberries. The funniest thing about the wheatear, after seeing the amazing things people have done with it, is the comment in Donna Kooler's Encyclopedia of Needlework "Works best in straight rows, but may handle gentle curves."

This is what occupied my time, the stitch sample I'm sending off to Plimoth Plantation in hopes of participating in their jacket project. My favourites, which ktj concurs with, are the Ceylon stitch worm and the Spiral Trellis circle. The bottom sample is not in my test sample below, it is Detached Buttonhole Needlelace. The bottom right section lifts up.

Tuesday, June 05, 2007

I Couldn't Wait


How many of you knew I wouldn't wait until Wednesday to try out the Plimoth Jacket stitching? Well, you were right. Despite the silk calling me, I sensibly decided to try out the stitches and especially the shapes first with some perle cotton. So top left, detached buttonhole with reverse chain outline. Middle is trellis stitch on a backstitch outline. The worm is Ceylon stitch, very, very fun. The circle is spiral trellis which was a blast and the line is knot stitch which took a few stitches to get into. There is one more thing, and outline with detached buttonhole needlelace that I will try tomorrow. I am very happy I tested things first since all but the detached buttonhole and backstitch outline were new to me. It really helped to get the feel of the tension and size of the stitches. I can hardly wait to try it all with linen.
In case you are missed my original mention of the blog about this jacket, here is a link to the first post on The Embroiderer's Story blog that has a picture of the jacket.

Monday, June 04, 2007

Plimoth Plantation Jacket Project


MY KIT ARRIVED!!!!!

I am so excited. I can hardly wait to get started with this project. For those of you who haven't seen the information about the blog and the project, go to http://www.plimoth.org/embroidery-blog/

The instructions are excellent plus there is a CD with colour photos. And who can resist 4 new spools of silk. I'm trying to figure out when I can start, given that I must get some things done for work this week. I'm thinking I'll read over the instructions while I watch the kids ride, and then wait until Wednesday and Thursday when I have long stretches where I can really get into the stitching. I've used many of the stitches in stumpwork, but then there is this great spiral trellis that I can't wait to try. For those who like to look at stitch instructions there are pdfs of all the stitches in some of the blog entries.

Saturday, June 02, 2007

TAST 22 Satin Stitch

I use satin stitch heavily in many of the pieces I've been working on lately, especially stumpwork. But since I slacked off last week by using what I had been working on, I thought I'd do something just for TAST this week. The inspiration for this was a fill stitch gone bad, done by somebody else, and while it didn't work for that piece, I thought it would be perfect for this. The leaves and flowers are also satin stitch.

Since I've mentioned recent projects with satin stitch, here they are. These two are petals and leaves for a wild rose stumpwork project. I'm planning a special finish for these so I'll post more photos soon.

This is the tail of a dragon I'm putting in the center of a CQ pillow for my daughter. I started the dragon back in February with the tail and discovered I needed more floss but I could no longer find the DMC colour variations I had started with. They had stopped making the all dark blue and now only had a dark blue with purple. So I blended it in by adding some purple to the tail and then getting on with the rest. So far I am happy and so is my daughter. She likes the scale effect of the chain stitch in the body. I love the way the satin stitch reflects differently with the different directions.

Finally, here is the Virginia tapestry project finished and framed. Most of the motifs were made with stain stitch because that was the easiest filler for the designs the kids drew. Some, like my daughter, thought about the direction of the fur or petal growth while stitching, others went higglety-pigglety but they still look good. This was displayed at a county festival today and well received by those who saw it. It looks like a local museum wants it for the summer, but afterwards the principal wants to keep it at the school - she even paid for the framing!


Monday, May 28, 2007

Stitching kit done

Despite having a few other things to do, I managed to finish the stitching kit I'm giving to the art club teacher who supported my VA tapestry idea. The last meeting is today after school and I'll post the finished tapestry tomorrow. For the top of the tin I decided on a real sampler of stitches so she would have a small reference library in hand. Being a part of TAST made this an easy project, although choosing what to do was a bit hard. The top row is cross stitch, the next a blackwork lozenge motif, both done with cotton floss, then Queen stitch, which is done with flower thread. The initials are cross stitch again, but this time in Vicki Clayton silk. The chevron stitch is done in linen thread (you may recognize this from my TAST work). Next Algerian eye done with Gumnuts Poppies wool/silk thread (really fun to work with). The up and down buttonhole variation is in floss again (this was from Elizabeth at Quieter Moments) and finally a row of flowers with herringbone leaves done in flower thread (remember TAST week 1) and French knot flowers in floss. The border is the crossed buttonhole from TAST last week.
Here is a side view show the ribbon I used to cover the tin. The lid has had dyed silk ribbon wrapped around 3 times. The bottom is some new Martha Stewart ribbon from Michael's. It is self adhesive and fit perfectly around the bottom of the tin. I used the same ribbon and a couple of the others in the pack to cover the bottom as well.
Inside is the biscornu and scissor fob, on a new pair of scissors. I put a magnetic bottom in the box, and included some gold plated needles and a needle threader. Below is the finished scissor fob since it wasn't completed in the last post.
I really had a great time doing this. I always wondered about people who specialized in 'smalls' but now I can really see the appeal. It was just so much fun deciding what to include and stitching up these things, and the change from stitching to finishing keeps the interest going. Mind you, I think I need to read up on how to finish tin tops. I sort of fudged it with some double-sided fusible interfacing and double-sided tape and I'm sure there must be a better way.

Saturday, May 26, 2007

TAST 21 Crossed Buttonhole Stitch

As mentioned in my last post, I decided to devote my stitching time to making a small sewing set for the art club teacher who didn't think I was crazy when I suggested the VA tapestry project to her. So while I don't have a neat little picture or interesting set of variations, I do have this week's TAST as a nice border on a biscornu and scissor fob. This is the finished biscornu (can't begin to list all the sites I have seen this at, as well as seeing a couple done by an EGA chapter member at a meeting, just Google the word and you'll get instructions).


This is the top of the scissor fob. Both of these will fit in an Altoid's tin, so I'm also going to stitch something for the lid. I'm not sure what yet, but it will have the same blue crossed buttonhole border.

I'm using 28 count Monaco cloth for this project and it is the first time I have used this type of cloth. It is quite nice for the over one work I am doing on these pieces. One of the members of my EGA chapter did some hardanger work with it and she thought it worked quite well for that. Having recently done a pilot class for a pulled work project I think it wouldn't be very good for that, a bit too stiff.